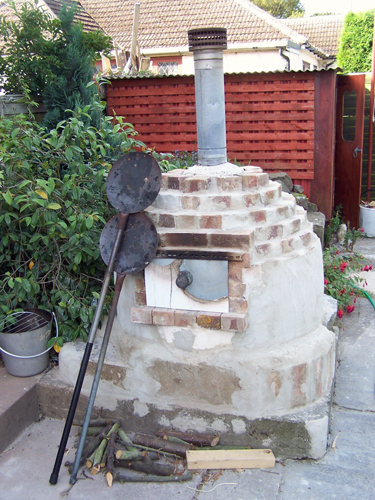
This is an account of how I built the outdoor pizza oven here at EcoDIY. The oven has been a great success for us. We use waste wood from pallets or the thin branches that are too small for the wood stove and have cooked the best pizzas I have ever tasted as well as a range of cakes, stews, bread, and puddings and all without a penny spent on fuel.
I always start a project by gathering the materials and tools I will need. In this case all the materials were free (recycled) except for the cement and the pizza paddles. We used:
• About 200 ordinary clay house bricks (recycled from a skip is fine).
• Something to build the base to build the oven on (to save your back when cooking)
Recycled concrete blocks are good or you can build walls from broken concrete and fill with rubble or soil topped with a thin layer of concrete.
• Sand and cement for the mortar, a little Builder’s lime is good as well though not essential.
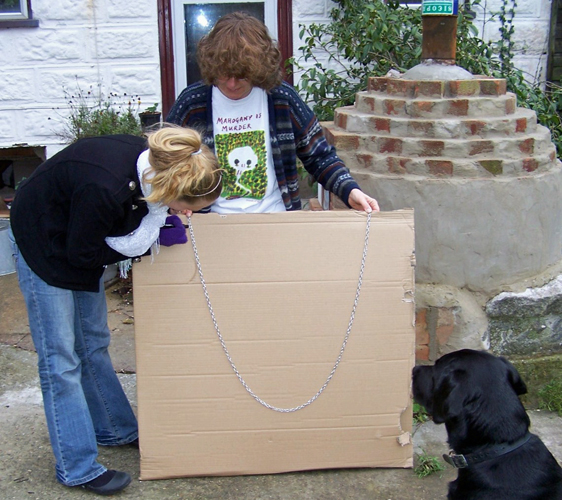
• A piece of cardboard such as part of a large box, the dimensions of the inside of the oven, to make a template. Our oven is 550mm diameter by 380mm high inside.
• A chain or heavy piece of rope to mark out the curve on the cardboard template
(see photo).
• Something to cut bricks with i.e. hammer and masonry chisel (or bolster) or an electric disk cutter.
• A bricklayer’s trowel, shovel and a level.
• A piece of scrap metal flu pipe about 100mm to 150mm in diameter and a meter long for the chimney.
• A short piece of bed iron (angle iron) about 500mm long to go above the door.
• A piece of scrap steel sheet about 400mmmm by 240mm for the door (from the casing of an old central heating boiler or washing machine etc). A length of galvanized fencing wire or suchlike, a metal handle or door knob.
• Two Tava pans bought from an Asian supermarket get them on the internet at www.theasiancookshop.co.uk for £8 each/ or use old frying pans. The wooden pan handles are replaced with long metal pipes to make them safer and easy to handle.
Building the base
Our oven had a base about one meter in diameter and 600mm high. We built our base out of recycled concrete blocks (we demolished a garage on the building plot next door) and leveled it off with cement. We picked a spot near the kitchen, but bear in mind that there will be smoke!
Making the cardboard template (to guide you as you lay the bricks)
We made the inside of our oven to a catenary curve as this is the strongest shape for this kind of dome. To make this shape, stand your cardboard up and hang a chain with the ends of the chain the width of the inside of the oven apart and the bottom of the loop the height of the inside of the oven down. In my case the width was 550mm and the height 380mm. Get your friend to draw round the chain and then cut on the line to make the template. This will guide you as you lay the courses of bricks making your oven’s dome.
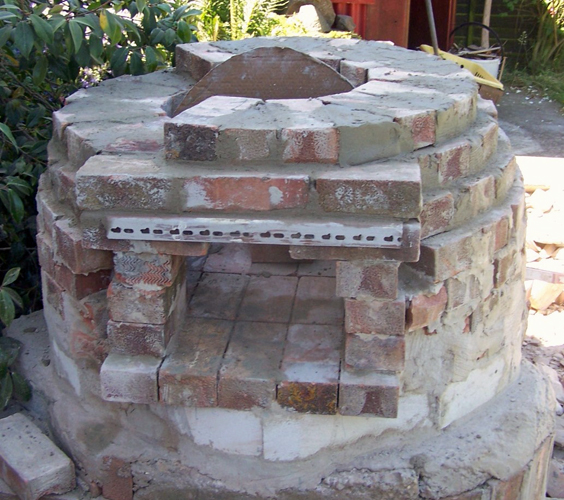
Building the Oven
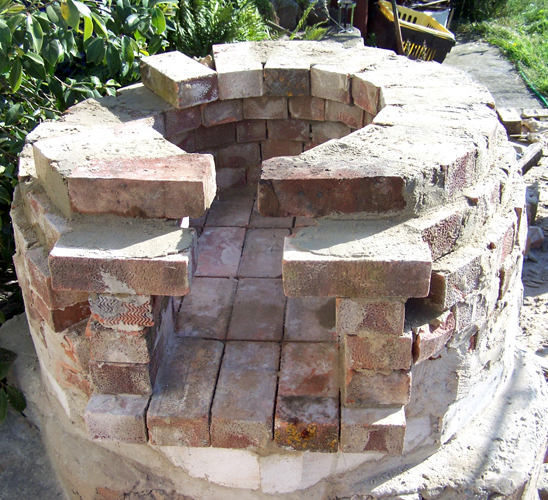
The first part of the oven is a circular floor of bricks; try and lay the bricks close together with no mortar between them and make your floor as level as possible. The ideal mortar for the oven is six parts of sand to one part of cement and one part builder’s lime. If you can’t get builders lime use a three parts of sand to one part cement instead. A little washing up liquid added to the mix helps to make the mortar easier to use.
The width of our oven door was 320mm and was set by measuring the oven trays we were going to use (keeping the door as small as possible makes the oven stronger). The wall of the oven is 9 inches thick (the length of a brick) and the bricks are laid radially keeping the mortar away from the hot inside face (the bricks will stand the heat but the mortar won’t like it). Lay the first 3 courses of brick leaving a gap for the door. You can cut the bricks for a snug fit but if not fill the gaps between the bricks with broken brick to save mortar.
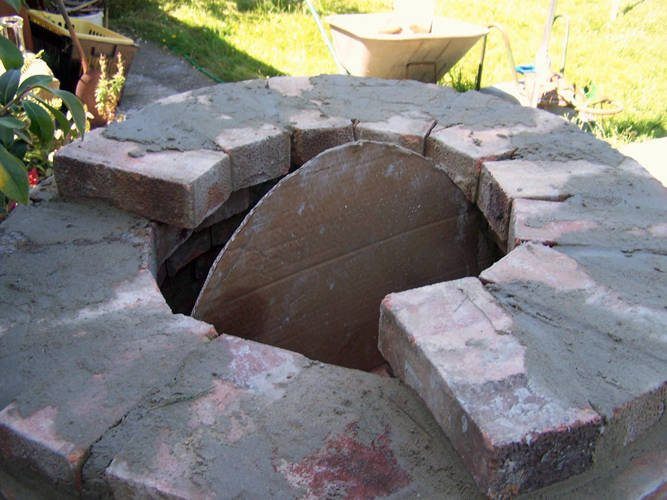
Next wedge the cardboard template into place and carry on laying the bricks to make the dome (lay bricks touching the cardboard edge). Move the template round to give you the shape of the dome as you build.
Mortar the angle iron door lintel in place above the fourth course of bricks.
The last ring of bricks holds the flue pipe in place. Put the pipe in situ and lay the bricks tightly up to it. Finish around the pipe with a ring of mortar. A coil of fencing wire makes useful reinforcing when buried in the mortar around the pipe.
The door is made from a piece of scrap steel sheet with an old metal handle (we used a door knob.) bolted on. Thick leather gloves are essential when handling the door or the cooking pans
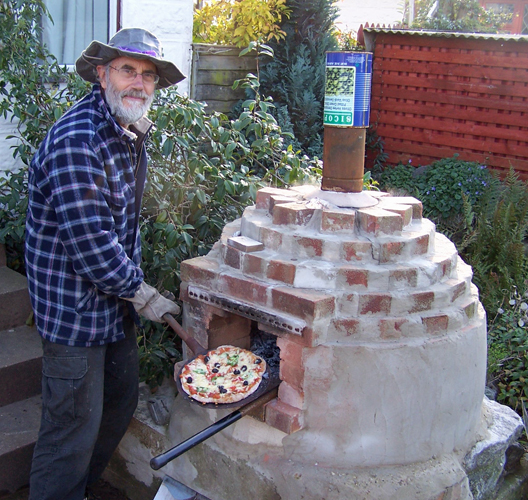
Using the oven
We burn our stove for about one and a half to two hours to heat up the bricks. The embers are then scraped to the sides and we can start to cook. We cover the chimney flue with a tin can to stop the draft. We cook a series of dishes in each session; starting with something that needs a very hot oven, pizzas are ideal as they cook in as little as 2 minutes when the stove is at full heat. We start the dough at about the time we light the oven. We can then use the remaining pizza dough to make bread rolls or small loaves. These cook after the pizzas in about 20 to 25 minutes. As the oven cools we then cook a cake, flapjack or baked potatoes (wrapped in foil). If the oven cools down too much you can light a fire again for a short time (about 15 minutes) and go on as before.
We celebrated our new bread oven with a pizza party.